Monday, May 16, 2011

iPhone - putting songs on your iPhone


05.16.11: This is an update to my Feb 2010 blog item.

I do this this on my 3GS iPhone periodically.

This is for Windows 7 users only.

iTunes may try to suggest you buy their songs in order to add to your iPhone ... but that is not required if you have your own songs

As you are aware, iPhones have an IPod section where all your songs can be stored. Apple tries to make it a problem to add your songs (vs their paid for songs).

Here are the steps to move your PC songs to your iPhone:

1. start iTunes on your desktop but don't connect the USB cable yet

2. to add a folder of songs on your PC to the iTunes Music folder, in iTunes, go to File - Add Folder to Library. Select the folder and click on Select Folder and it will move all the songs in that folder.


3. to add a song to the iTunes Music library in iTunes, go to File - Add Folder to Library and select the specific MP3 file

3. when you have included all the songs, attach the USB cable from your PC to your iPhone

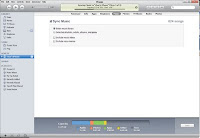
4. If you have automatically allowed sync (which you shouldn't) it will begin to sync immediately. Otherwise, right-click your name on the left menu in iTunes (see pic) and select "sync".

4. sync of music items (aka moving songs to your iPhone from your PC) is now happening (see pic)

6. when sync has finished (may take a while), unplug the iPhone

iPhone - copy photos and songs to PC

05.16.11: There are problems ensure no loss of photos and songs when you restore your iPhone (see previous item for details on backing up your iPhone).

There are numerous methods of backing up your iPhone photos, depending on which operating system in on your PC.


Backing up your songs is not required, if you loaded them from your PC. Check my other item on how to load songs to your iPhone.

Mac users need read no further. This is for Windows users only.

Windows7:

1. right-click on your PC desktop and select New -> Folder and name it iPhone Pics (any name you prefer). This will create a folder on your desktop.

2. USB connect your iPhone and it will automatically show up in your Windows Explorer (see Chas's iPhone in pic)

3. open this folder and drag and drop the items to the folder you created

You now have copied all your iPhone photos to your computer.


Sunday, May 15, 2011

iPhone - backup and not sync

05.15.11: I had trouble understanding the difference between 'sync' and 'backup' in iTunes for the iPhone.
I think I just figured it out ... and when/how to sync and when to backup.

It appears 'sync' means ensuring only items you stored in iTunes are on your iPhone.

Backup means copying everything on your iPhone to iTunes (overriding anything that was backed up previously).

My advice is NEVER do the Sync operation but periodically do the Back Up operation.
Before periodically backing up you iPhone, you need to attach your iPhone (via USB) to your PC where iTunes is installed.
You will then see the left menu "Devices" item with your iPhone (Chas's iPhone, in pic) .
When you right-click this item, it will open a sub-window with: Eject, Sync, Transfer Purchases, Back Up, Restore from Backup, Reset Warnings

To backup your iPhone:
1. do a Transfer Purchases
2. then do a Back Up

Unfortunately, this will not back up your photos.

When I take a pic, I send it via email to myself, to ensure i can retain it on my PC.
There are various methods of copying your iPhone photos to your PC, depending on version of windows ... not easy.
More on this in another blog entry.

Tuesday, May 10, 2011

iPhone - protection plan not worth it

05.10.11: I have reviewed the extended protection being offered to owners (2 years additional) that must be purchased within the 1st year of ownership.


In my opinion, they are in this protection plan business to make money ... not maintain customer relations.


Here is what I have understood in the T&Cs that convinced me it is NOT worth the investment.


1. doesn't cover damages (scratches, cracks, breaks, etc)

2. doesn't cover lost or stolen

3. doesn't cover an iPhone that has been opened by unauthorized persons

4. replacement parts (including iPhone) may be refurbished

5. you need to prove a battery has lost at least 50% of its original charge, in order to be replaced

6. coverage is not extended, as a result of this service

7. no commitment to length of time required for repair and Advance Replacement Service (ARS) is completely at the discretion of Apple


In summary, it appears to cover manufacturing defects only ... which should come to light in the first year.


To-date, I have not heard of any "planned obsolescence" items.


The standard warranty doesn't cover the battery (replacement cost is $89) ... $10 more than the extended protection plan. This might be reason enough to purchase the extended plan ... if they determine it has lost at least 50% of its original charge in the three years and you would be willing to wait for the replacement to happen and make at least two trips to the centre (with cost of gas at least $1.40/litre).


I have been thru their replace/repair procedure and was very upset to understand I would be without an iPhone for one month or longer!


As standard usage plans are for two or three years, and some carriers are now advertising free iPhone with their plans ... and newer/better/cheaper product will probably be available that you will prefer instead.

Friday, May 6, 2011

iPhone radio clock charger - Future Shop


05.06.11: I bought one of these a while ago for the same price at Walmart.

It is a very good way to remember to charge your iPhone, use it as an alarm clock, and play your tunes when the alarm is on.

Just drop your iPhone on the contact when you go to bed.

One button on the radio/clock switches between iPod tunes on your iPhone and the standard radio alarm.

It has light settings and off for the clock viewing. Easy to turn illumination on/off.

When you awake, your iPhone is charged and you are listening to your tunes ... instead of the normal negative news or ads.